
Group management
Create and manage groups in an organization
Section titled “Create and manage groups in an organization”Overview
Section titled “Overview”The Groups feature lets you organise your organisation’s members into sub-groups — for example, by department or team. A user who is in a group always remains a member of the main organisation. Groups can be used to manage access and participation at a sub-organisation level within dataspaces.
This guide walks through the full Groups workflow as demonstrated in the portal.
Prerequisites
Section titled “Prerequisites”- You must be logged in to the DIH portal as an Administrator of your organisation.
- Navigate to: Profile → My organization
Step 1 – Open My Organization
Section titled “Step 1 – Open My Organization”After logging in, click your user profile or navigate to Profile → My organization in the top navigation.
You land on the Organization details tab, which displays your organisation’s legal name, address, and identifiers.
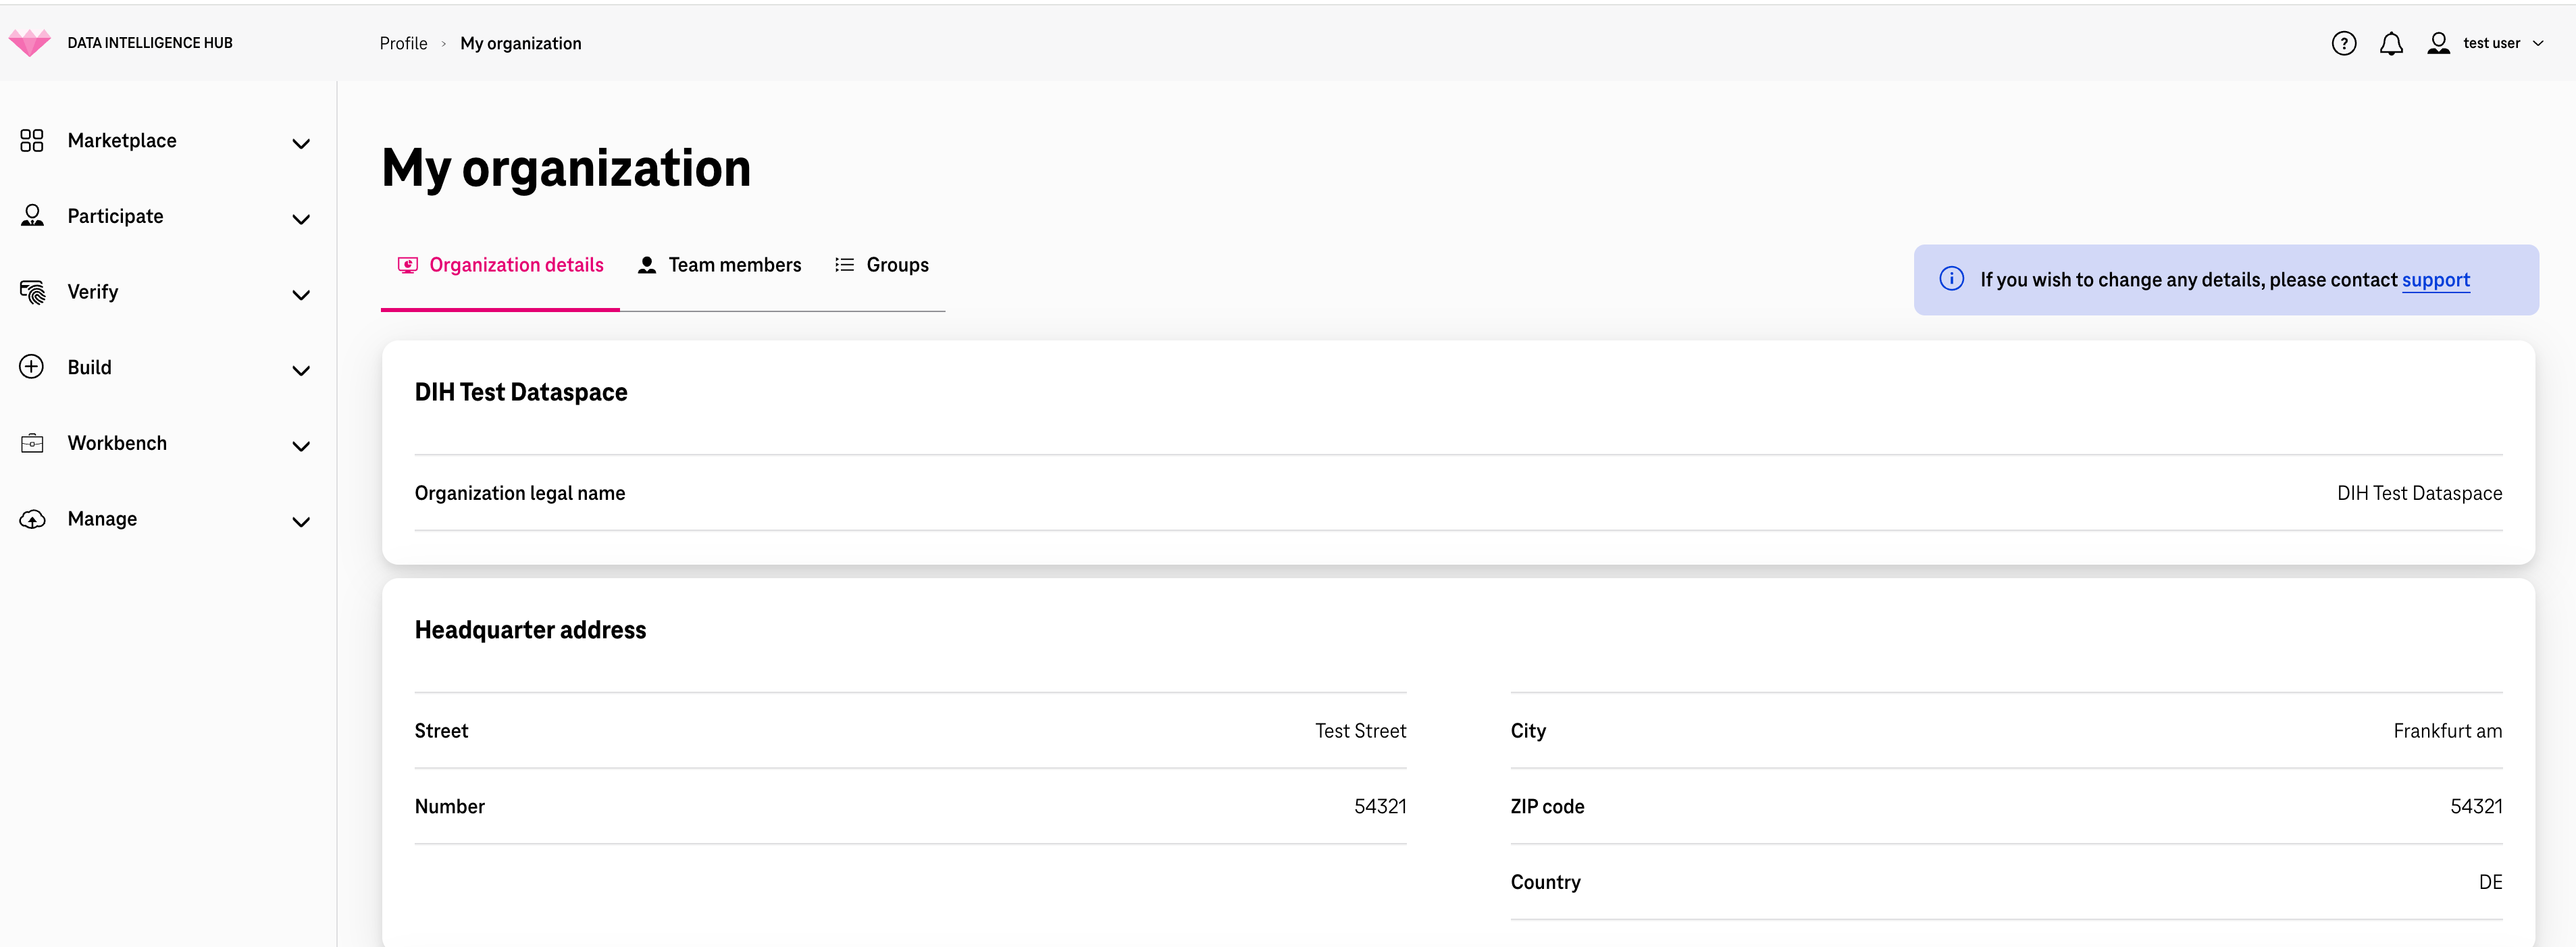
The page has three tabs: Organization details, Team members, and Groups.
Step 2 – Navigate to Groups
Section titled “Step 2 – Navigate to Groups”Click the Groups tab on the My organization page.
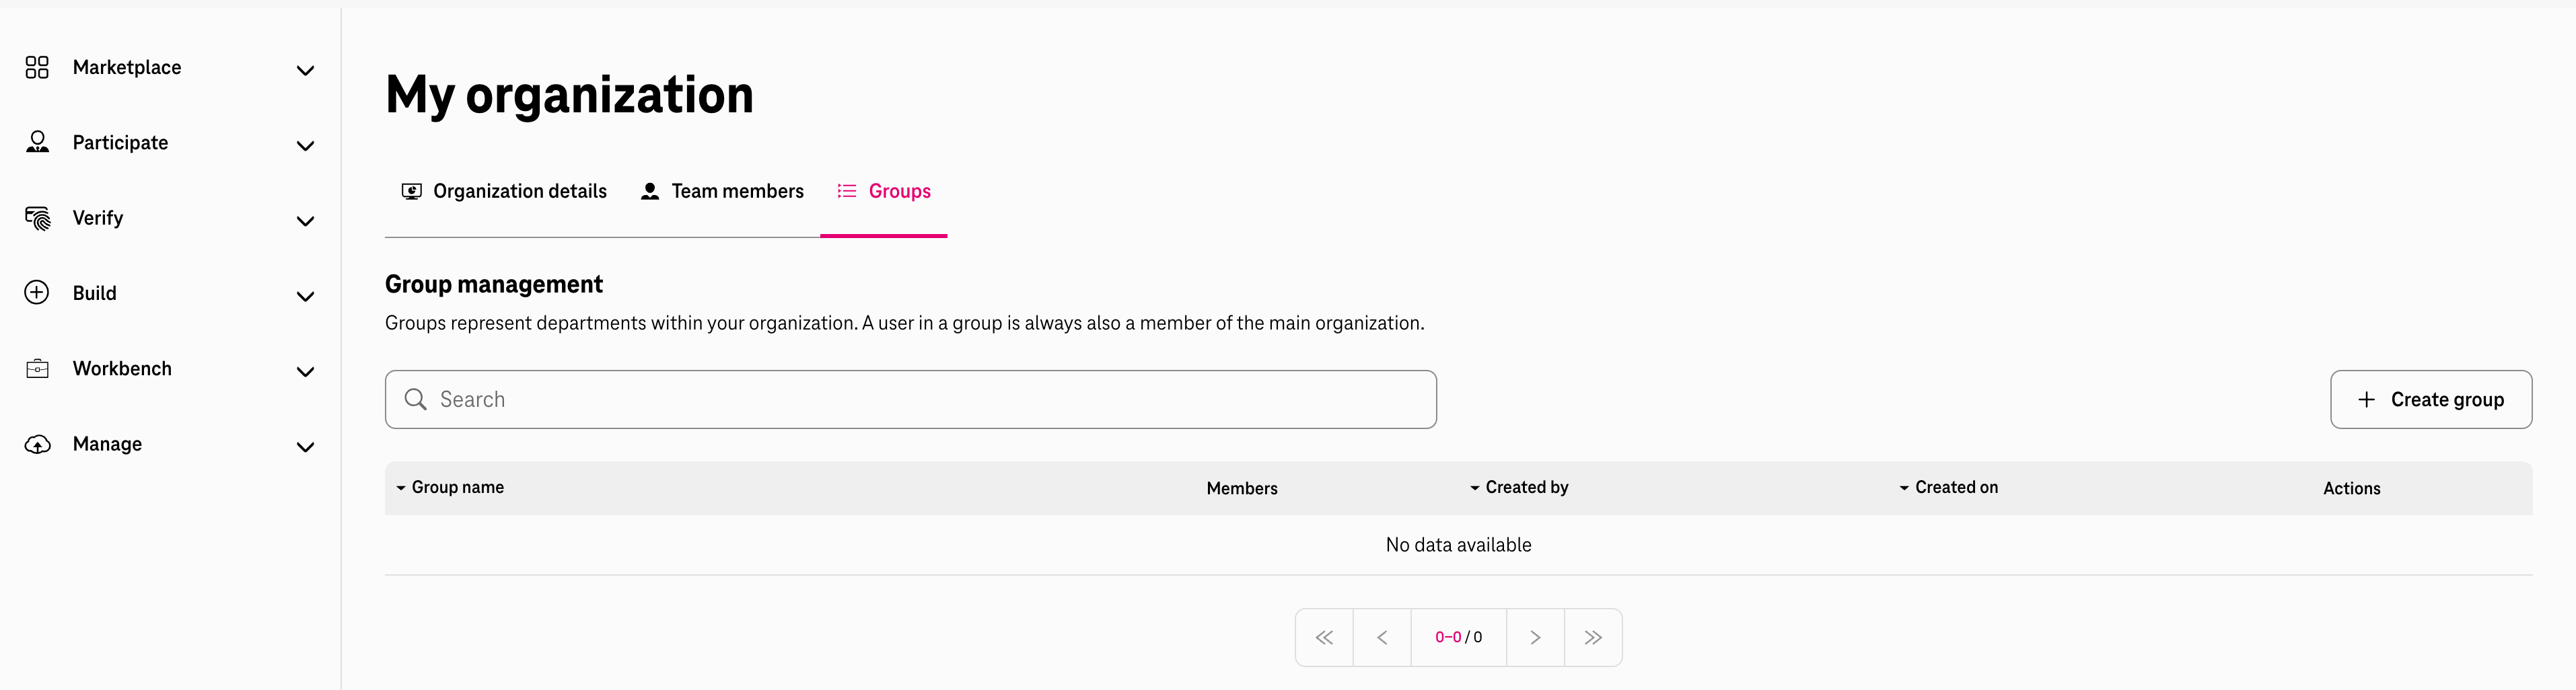
If no groups exist yet, the table shows “No data available”. The page explains:
Groups represent departments within your organization. A user in a group is always also a member of the main organization.
Step 3 – Create a New Group
Section titled “Step 3 – Create a New Group”Click + Create group in the top-right corner of the Groups tab.
A Create group modal appears.
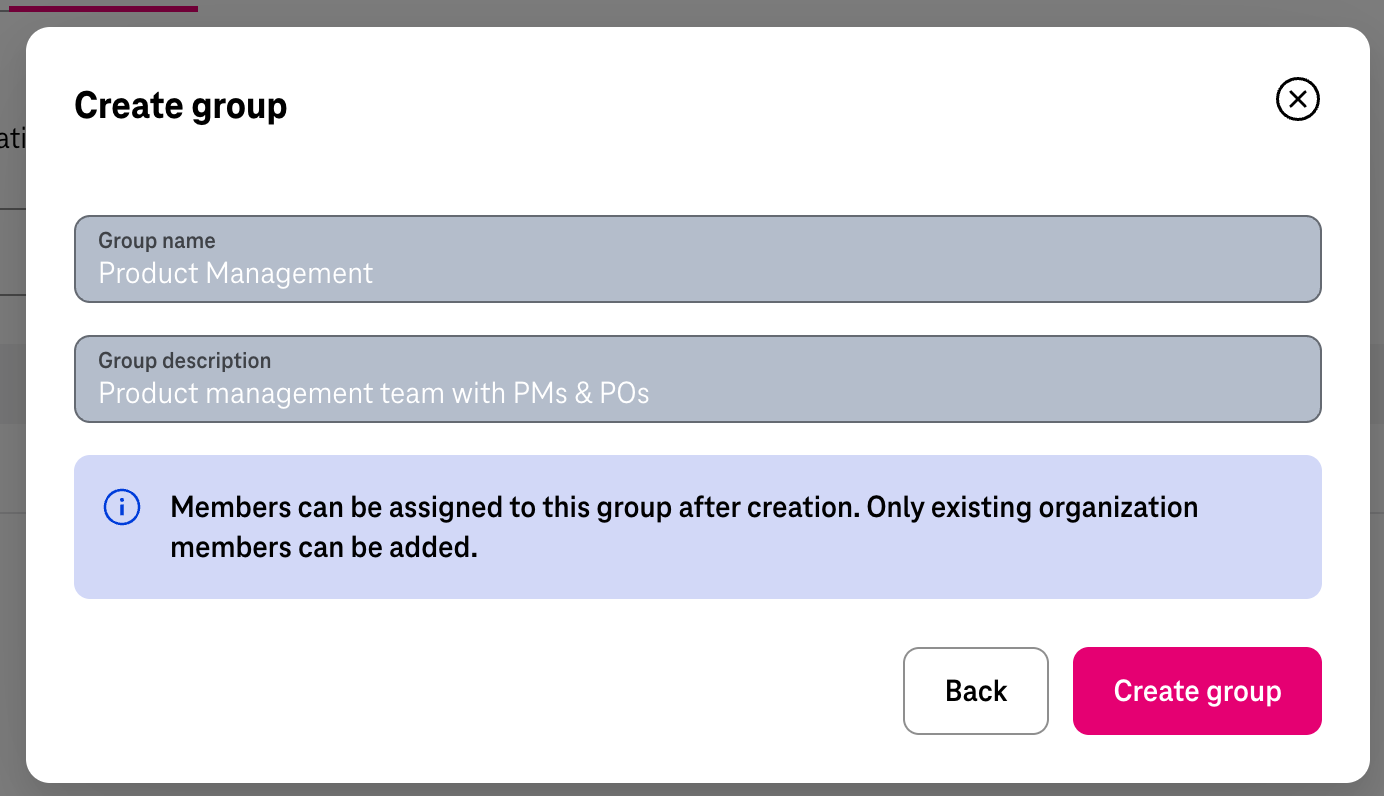
Fill in the required fields:
| Field | Description |
|---|---|
| Group name | A clear, descriptive name for the group (e.g. “Product and Portfolio management”) |
| Group description | A short description of the group’s purpose |
Note: Both fields are mandatory. The modal will show inline validation errors if either field is left empty.
An info banner reminds you: “Members can be assigned to this group after creation. Only existing organization members can be added.”
Once both fields are filled in, the Create group button becomes active.
Step 4 – Group Created Successfully
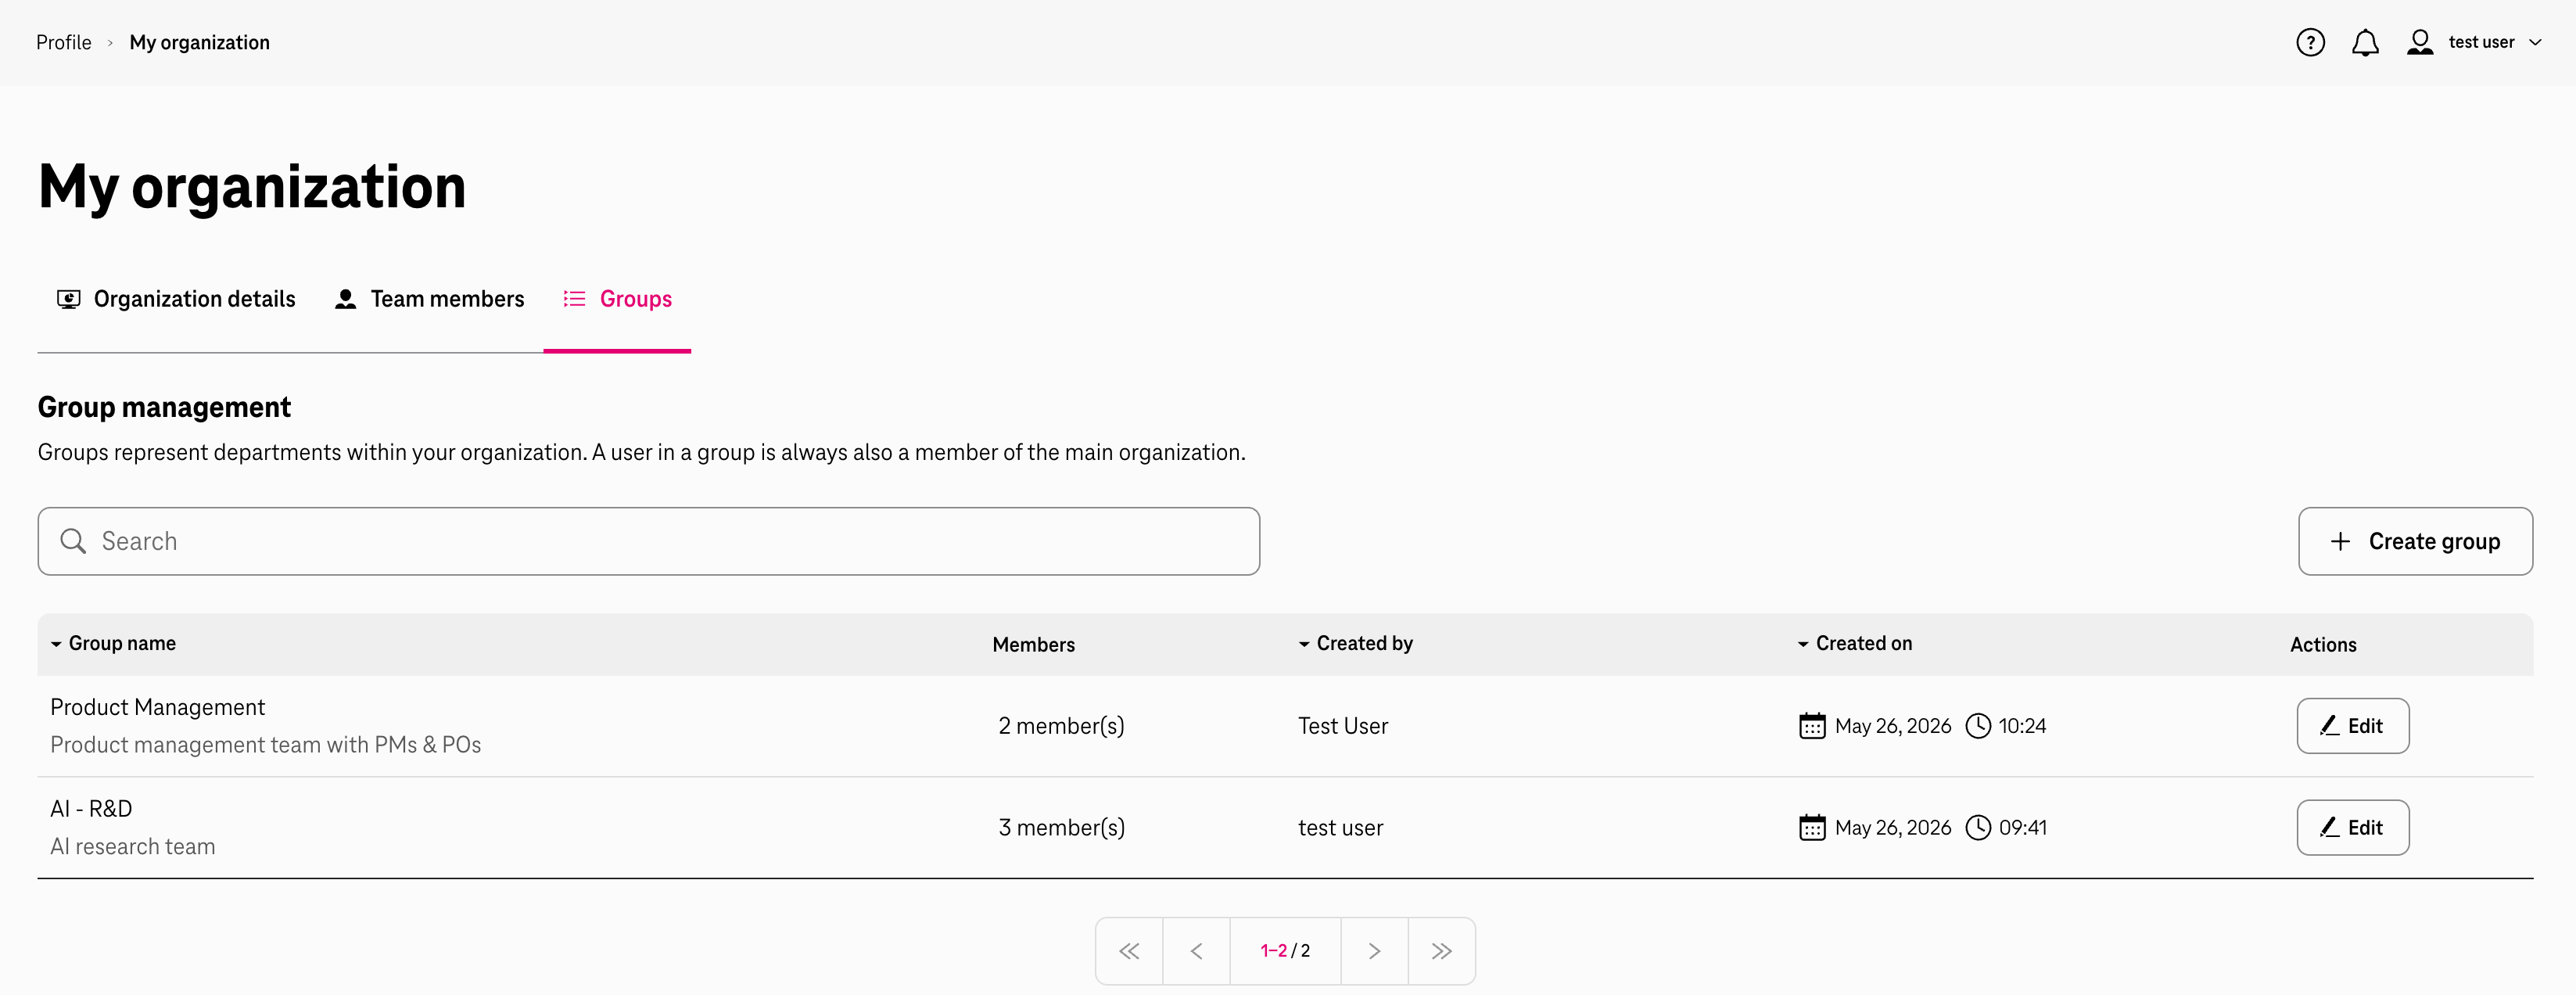
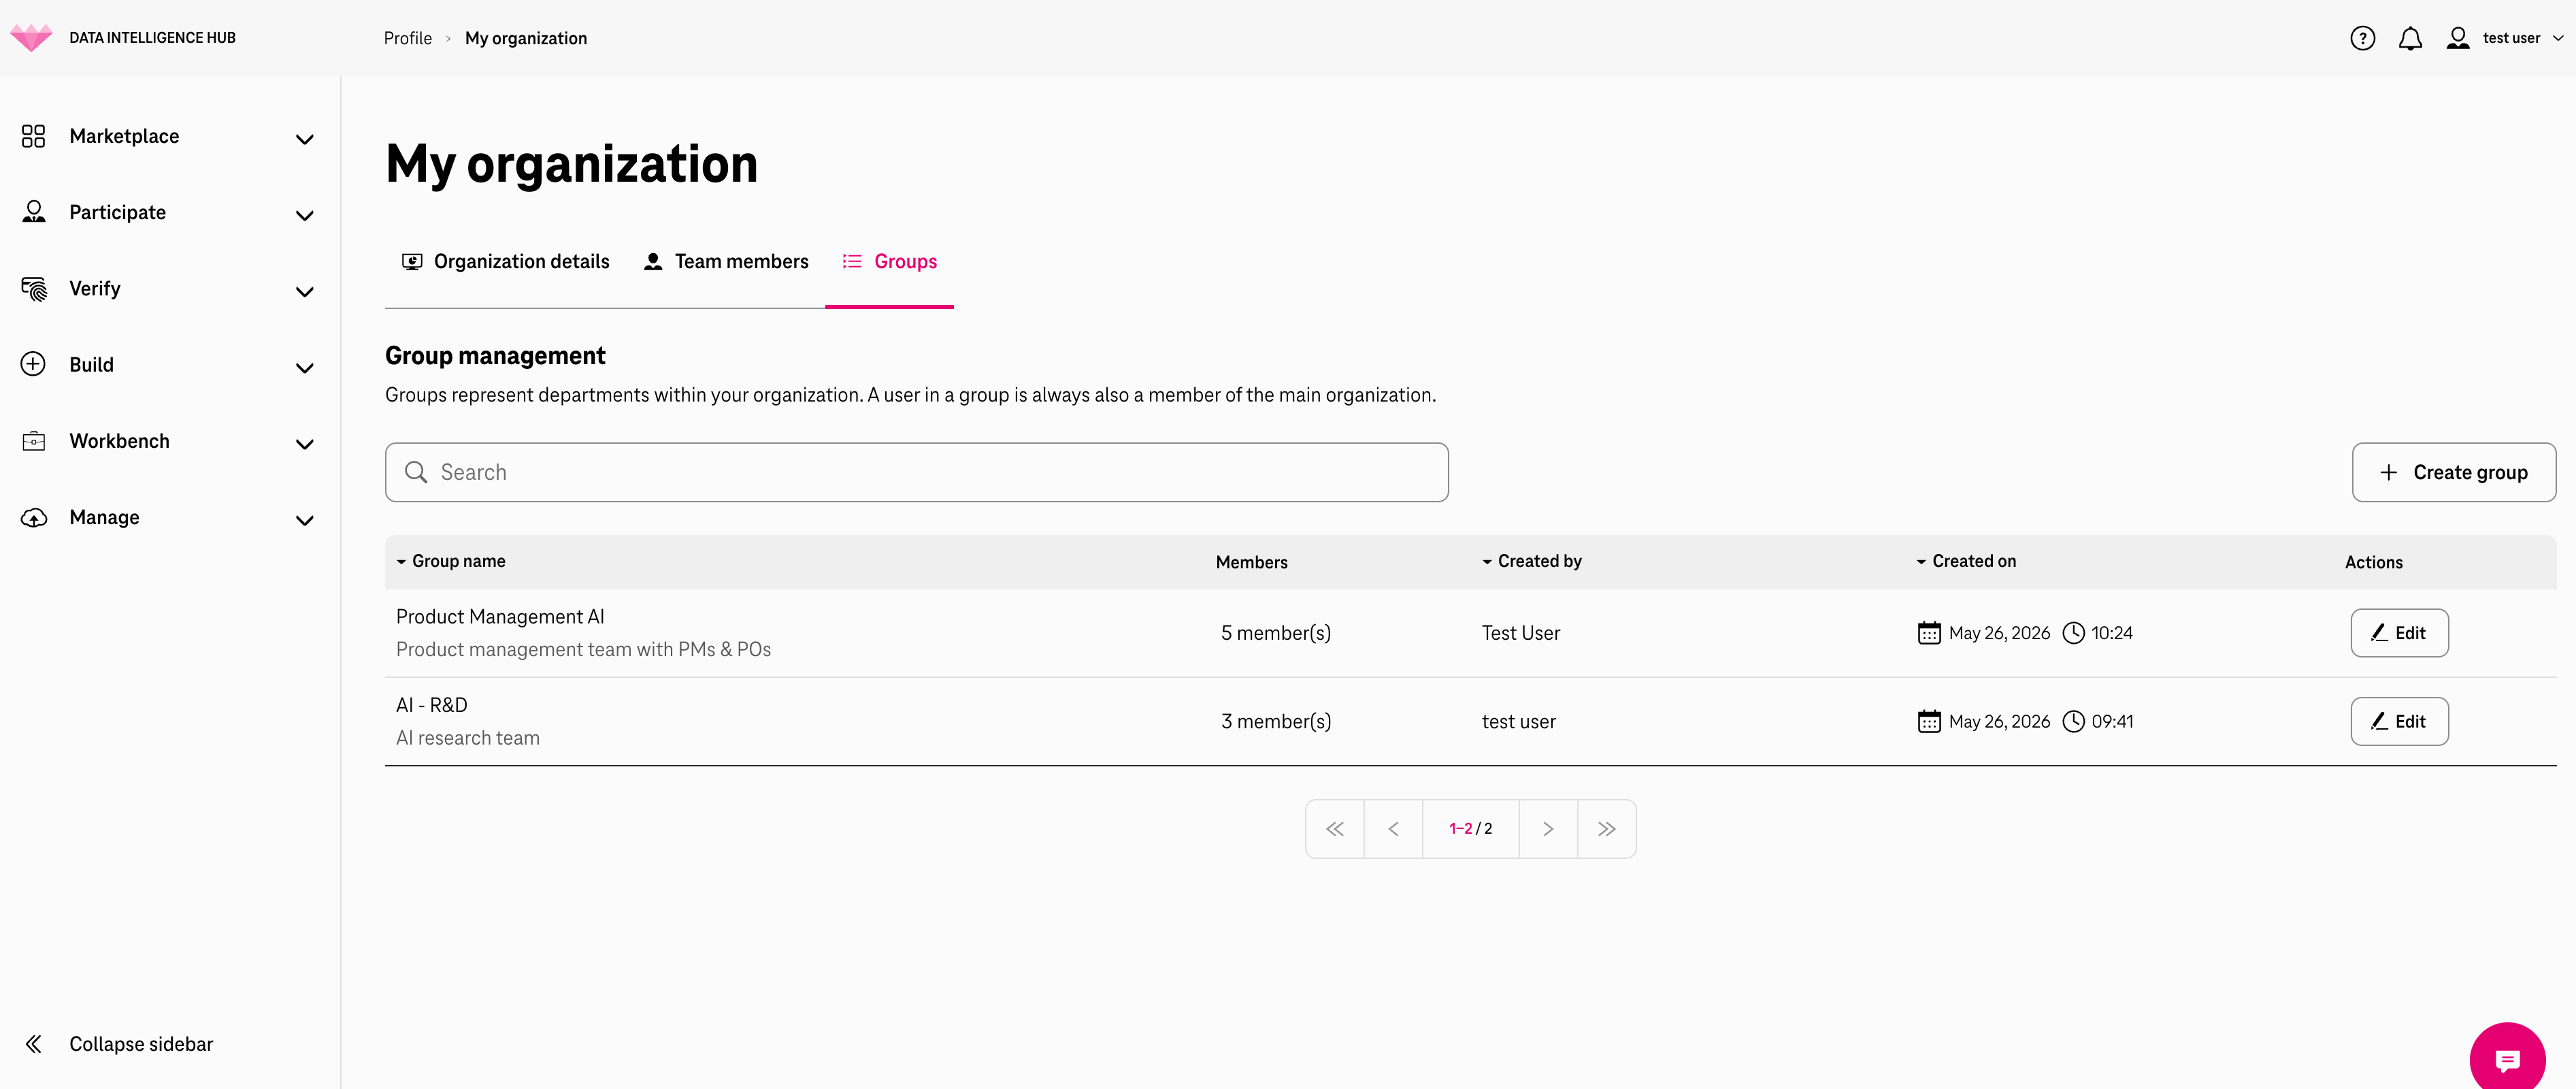
Section titled “Step 4 – Group Created Successfully”After creation, you are returned to the Groups tab. The new group appears in the table with:
- Group name and description
- Members count (initially 1 — the creator is automatically added)
- Created by name
- Created on date and time
- An Edit button in the Actions column
Step 5 – Edit Group Details (Optional)
Section titled “Step 5 – Edit Group Details (Optional)”Click the Edit button next to a group to open the group’s detail page.
The group detail page has two tabs: Group members and Group details.
Click Group details to view and update the group name or description.
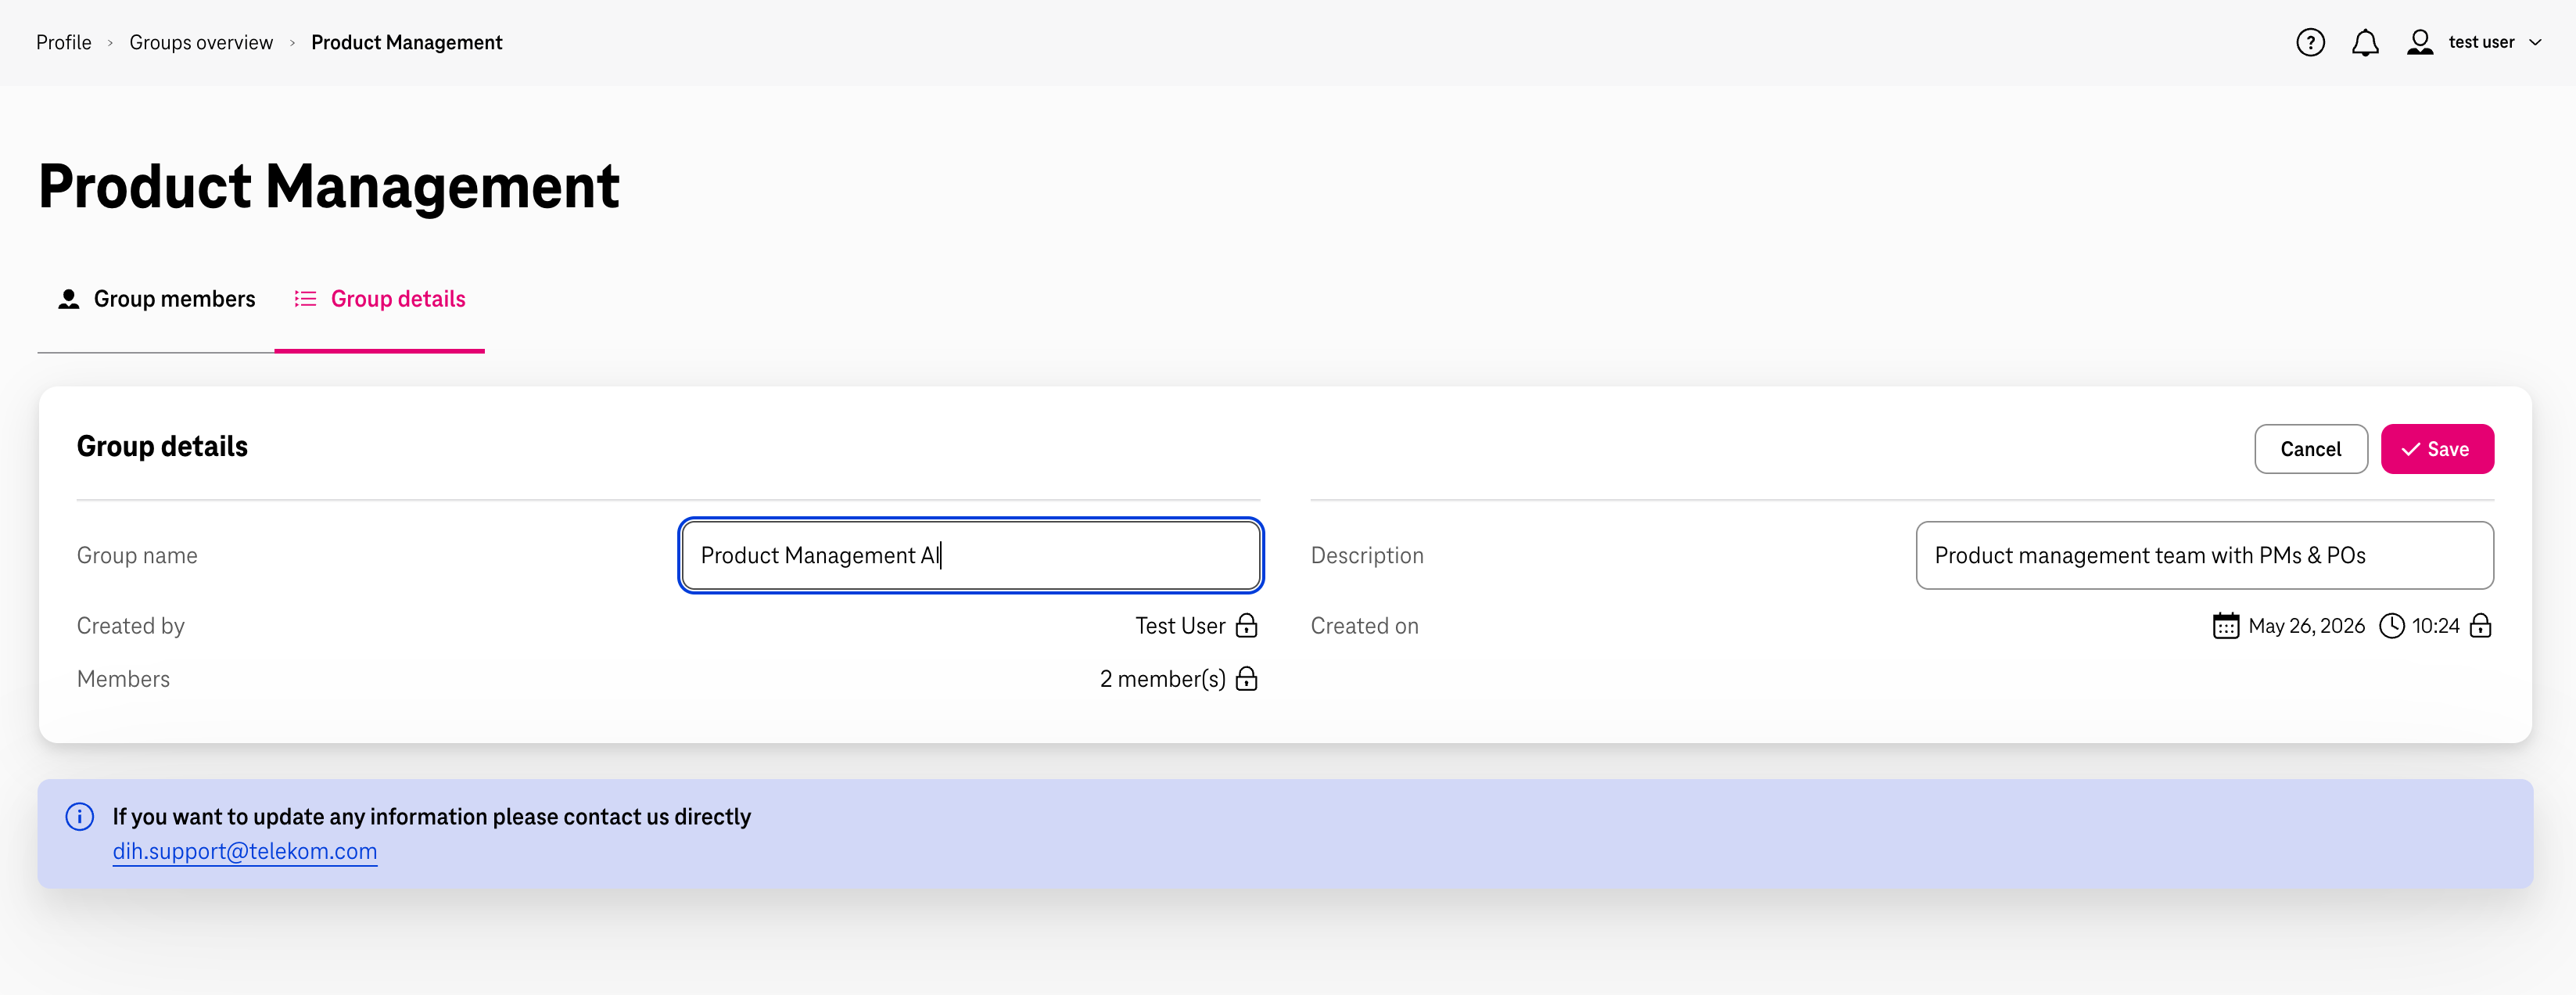
Make your changes in the Group name or Description fields, then click Save. Click Cancel to discard changes.
Locked fields (Created by, Created on, Members count) are read-only and cannot be edited here.
Step 6 – View Group Members
Section titled “Step 6 – View Group Members”Click the Group members tab on the group detail page to see who is currently in the group.
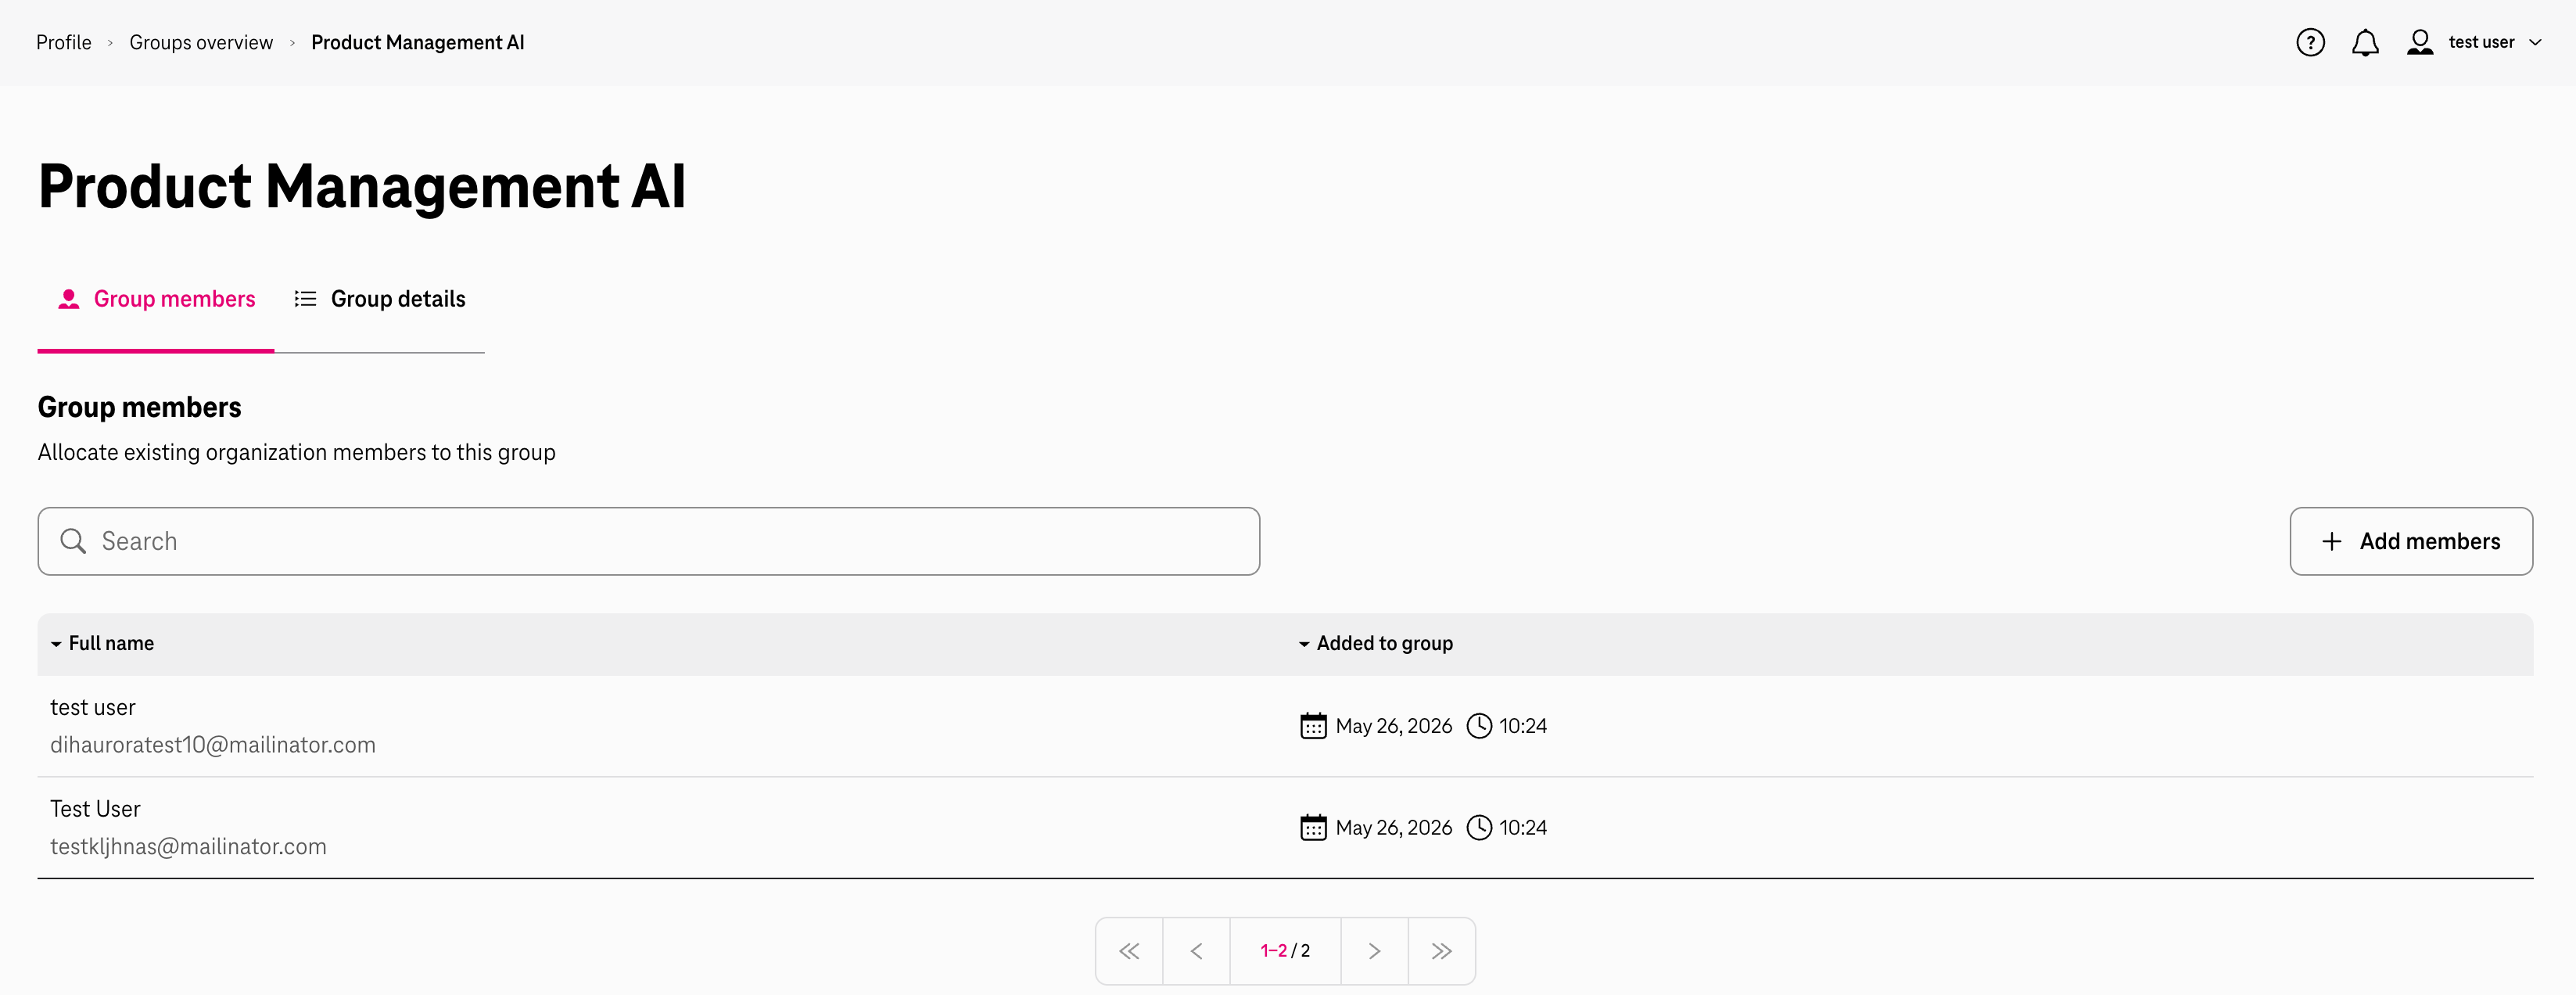 The table shows:
- Full name and email of each member
- Added to group date and time
The creator of the group is automatically added as the first member.
Step 7 – Add Members to a Group
Section titled “Step 7 – Add Members to a Group”From the Group members tab, click + Add members.
An Add members modal appears, listing all eligible organisation members.
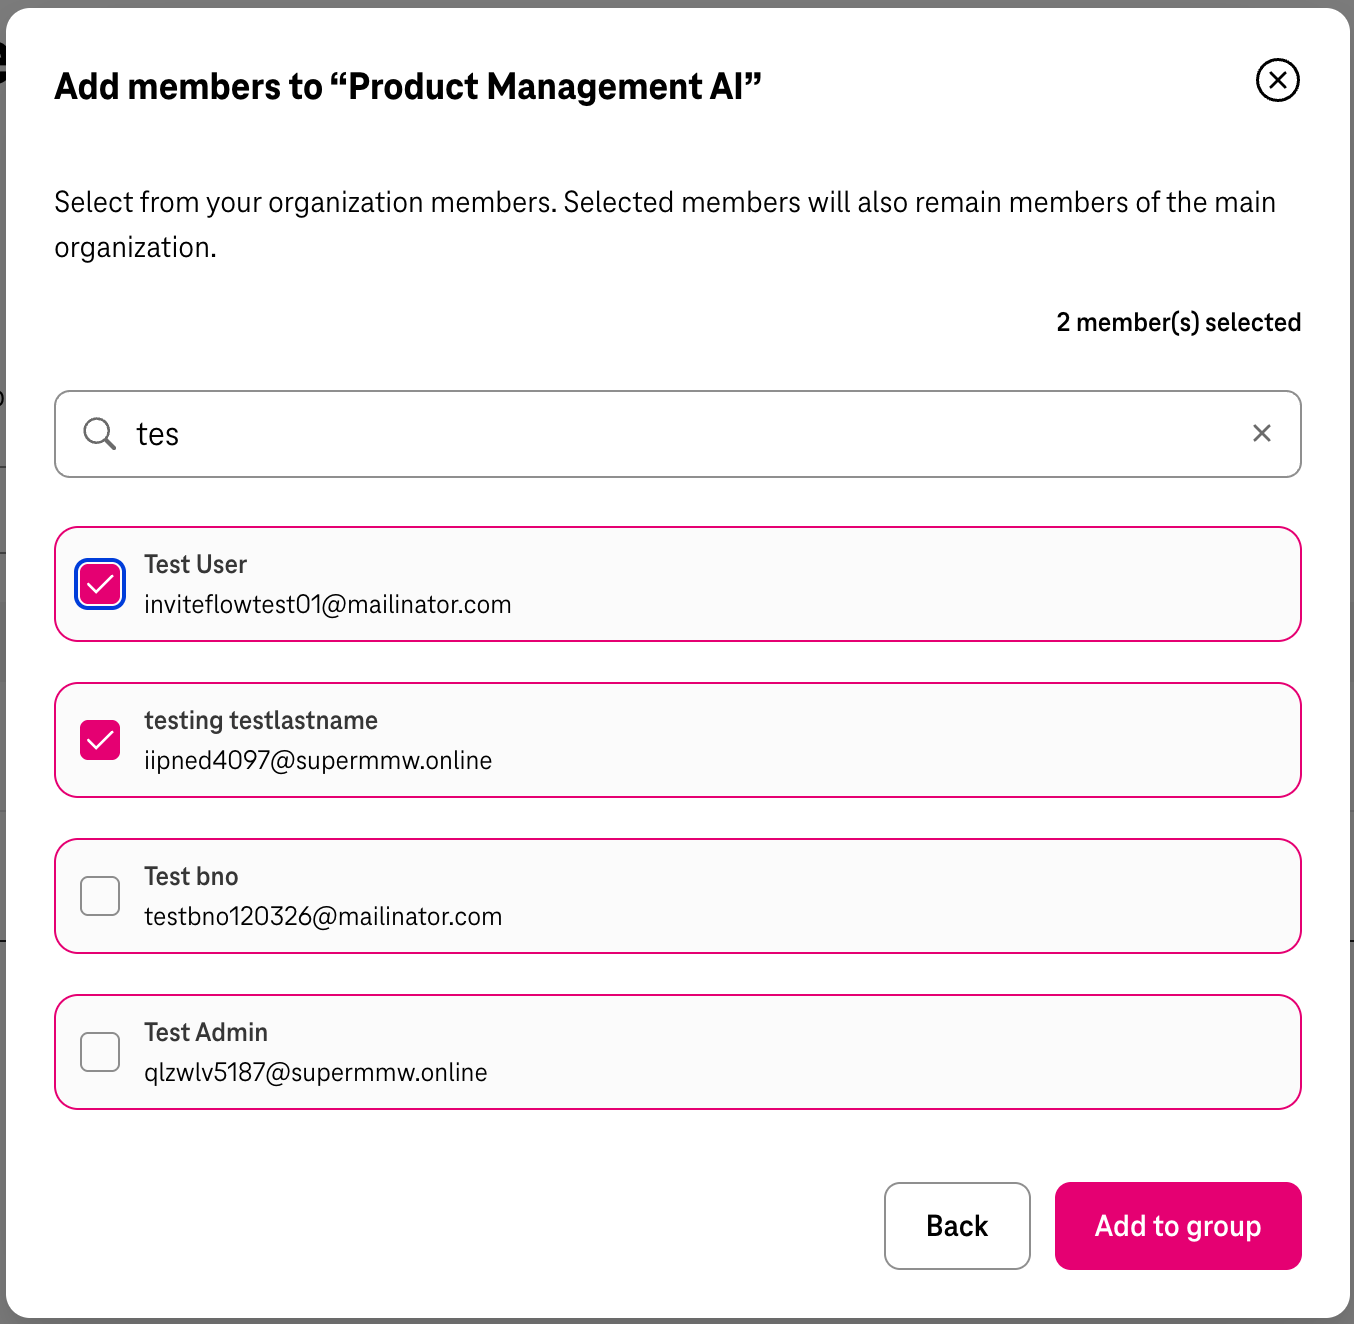
To find a specific member, type their name in the Search field. Results filter in real time.
Check the checkbox next to each member you want to add. The counter at the top of the modal updates to show how many members are selected (e.g. “1 member(s) selected”).
Once your selection is complete, click Add to group.
Note: Only existing organisation members appear in this list. Users must first be invited and accepted into the organisation before they can be added to a group.
Step 8 – Member Added Successfully
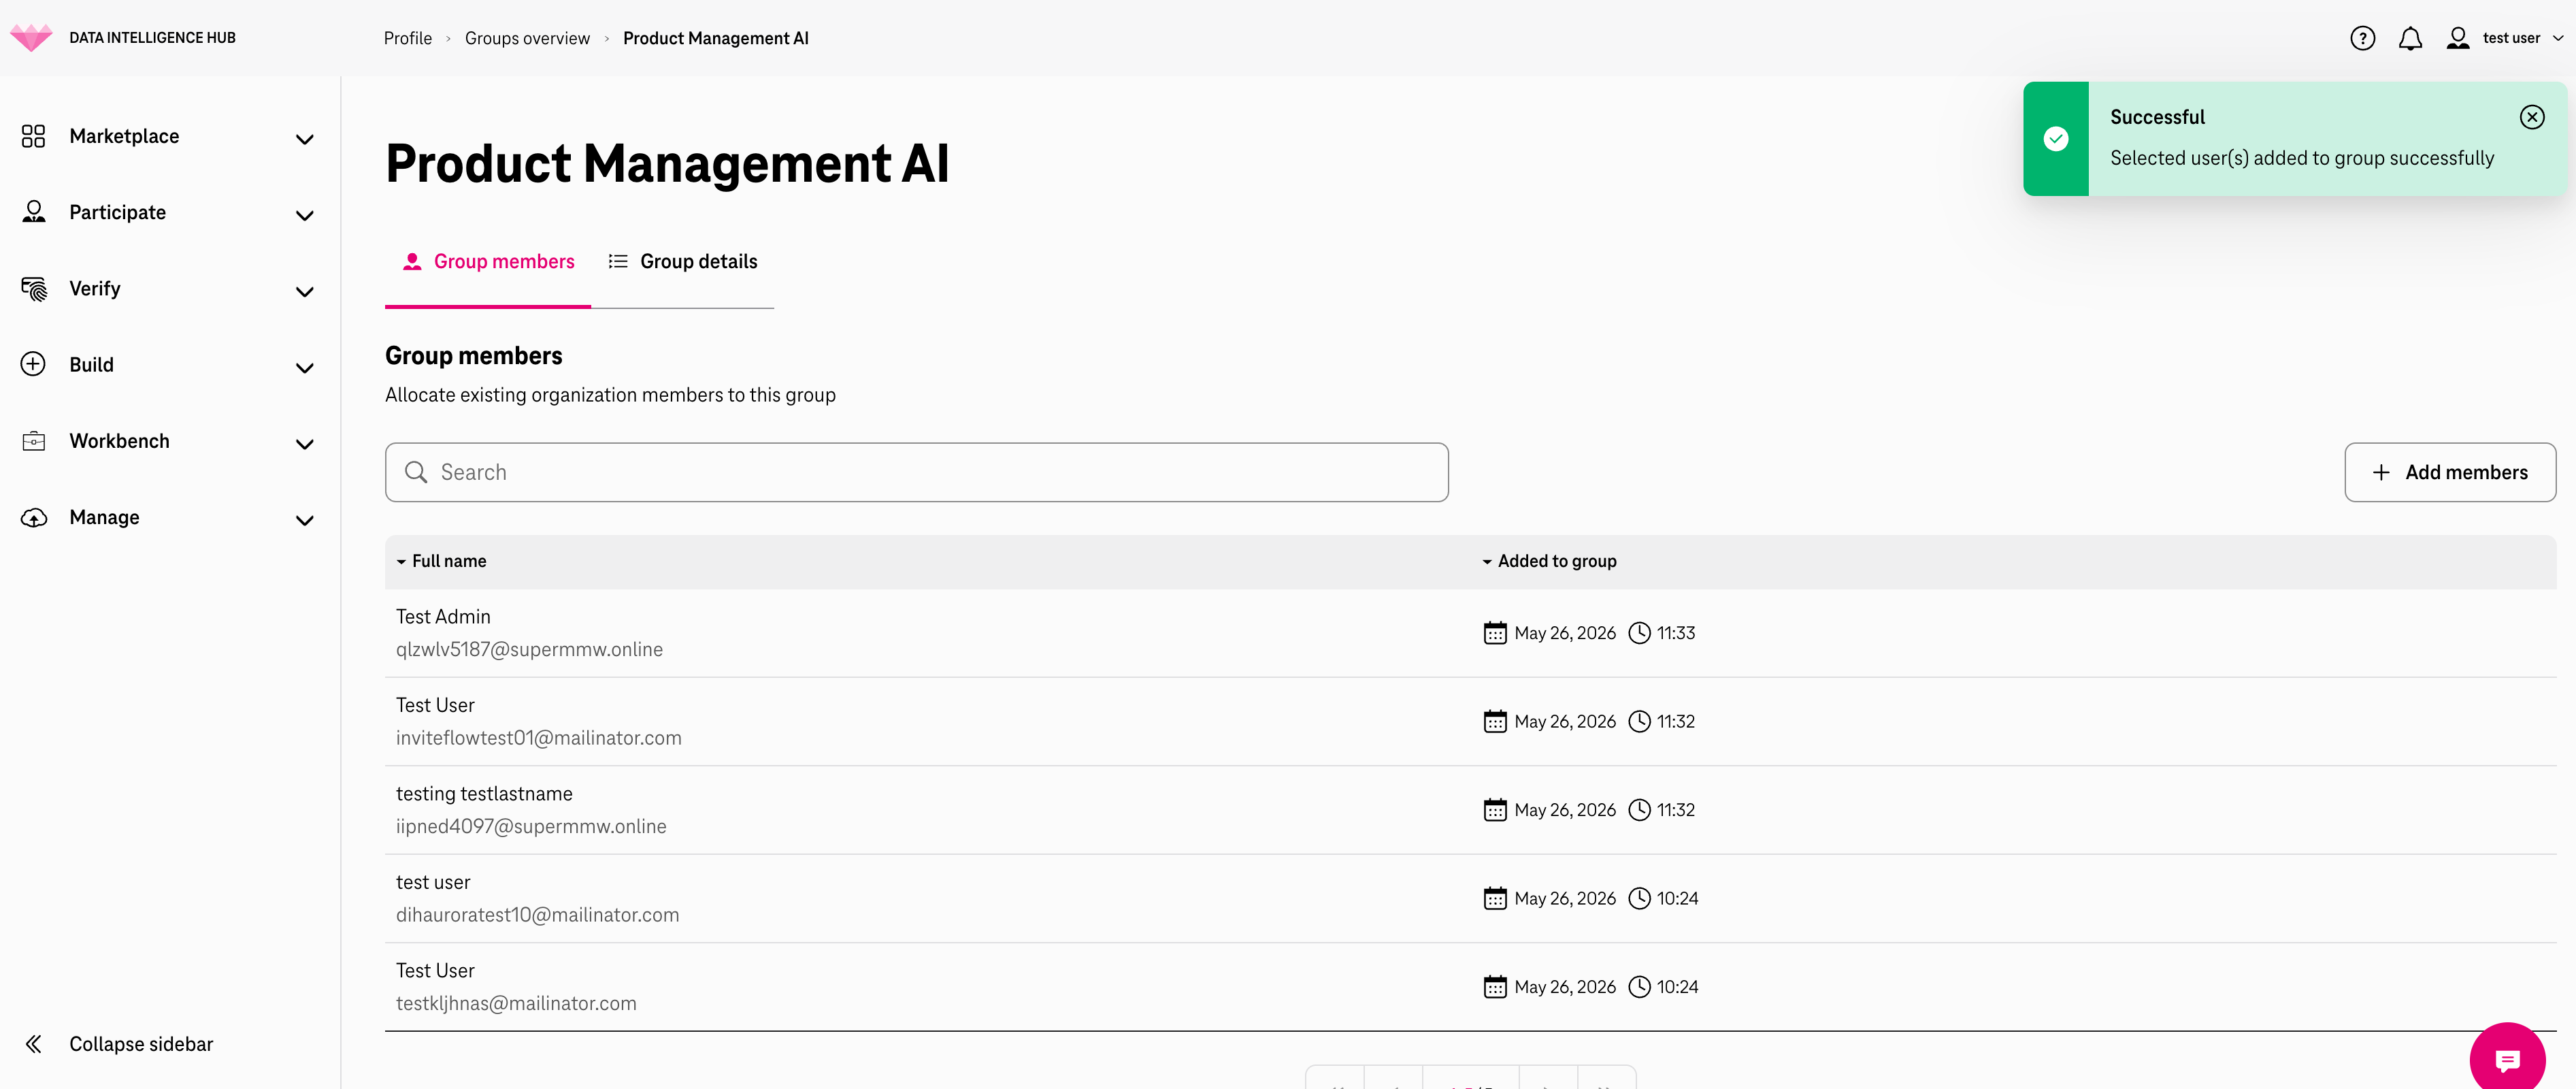
Section titled “Step 8 – Member Added Successfully”After clicking Add to group, a green success banner appears:
Successful – Selected user(s) added to group successfully
The Group members table refreshes to show the newly added member(s).
Step 9 – Verify the Updated Group in the Groups Overview
Section titled “Step 9 – Verify the Updated Group in the Groups Overview”Navigate back to My organization → Groups using the breadcrumb or the sidebar.
The Groups table now shows the updated member count for the group.
Step 10 – Verify Group Membership in Team Members
Section titled “Step 10 – Verify Group Membership in Team Members”Go to the Team members tab to confirm the group assignment is reflected there.
Use the Search field to find a specific user. The Groups column on the right shows all groups the user belongs to as pill badges.
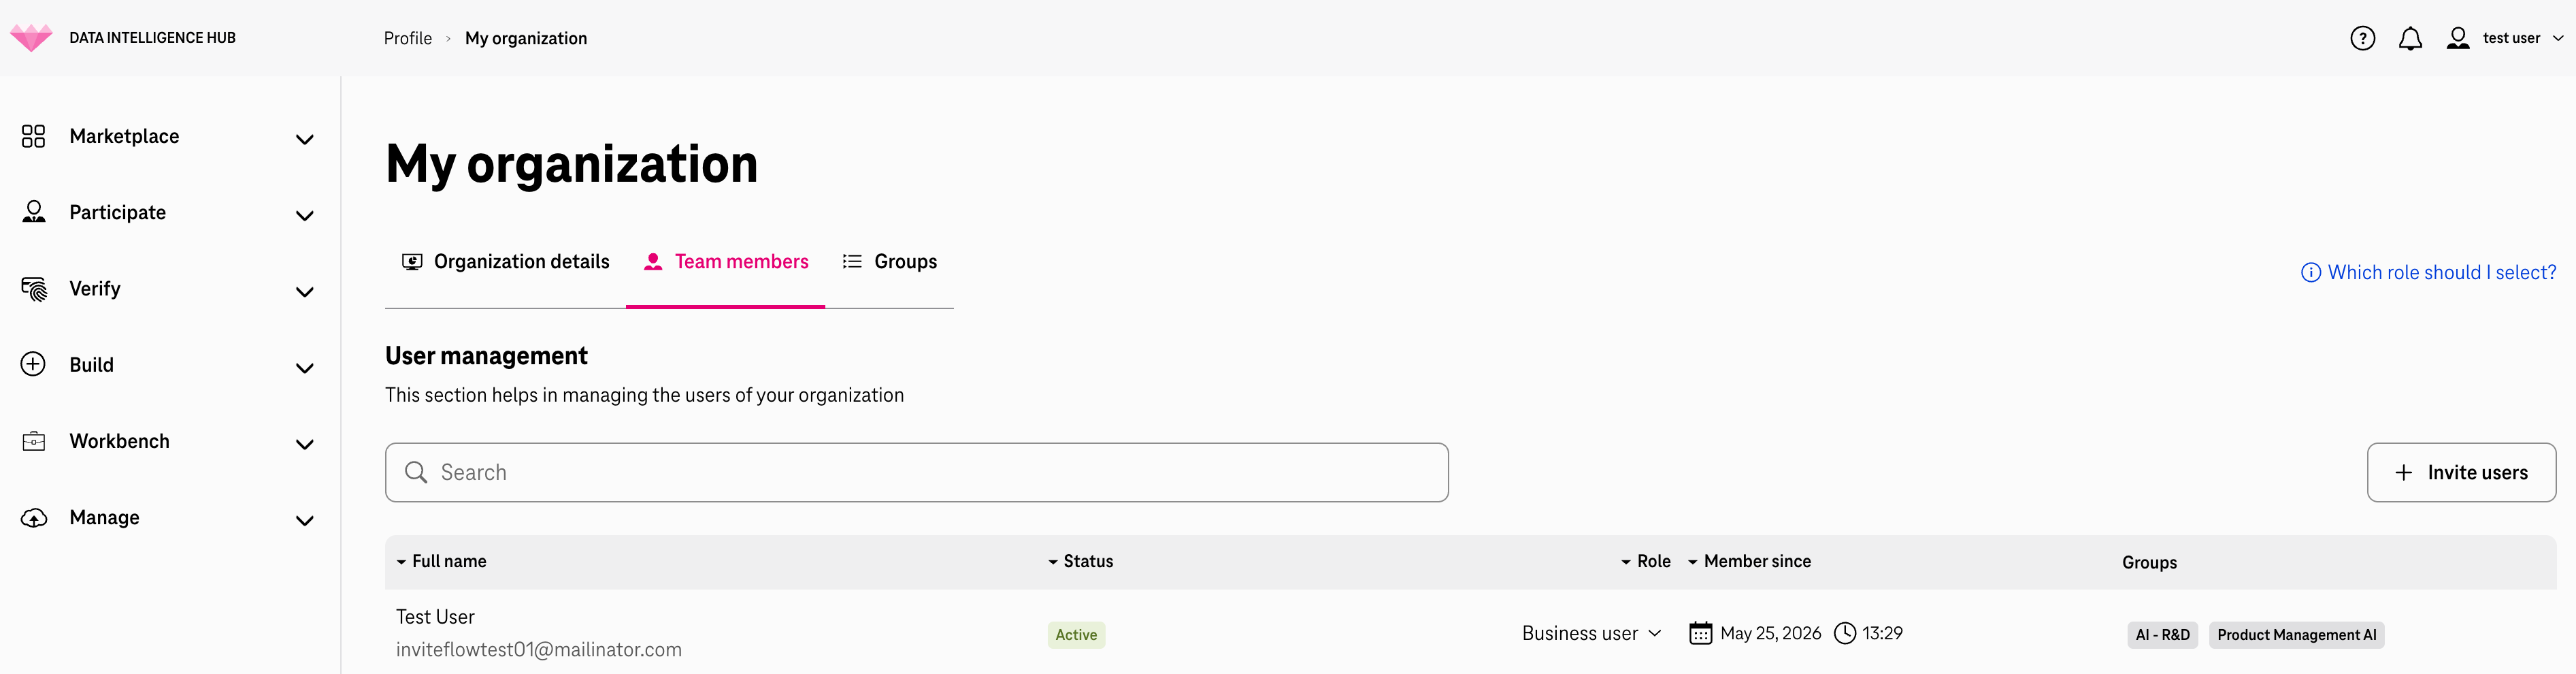
This confirms the group assignment is working end-to-end.
Summary of Key Actions
Section titled “Summary of Key Actions”| Action | Where |
|---|---|
| View all groups | My organization → Groups tab |
| Create a new group | Groups tab → + Create group |
| Edit group name/description | Groups tab → Edit → Group details tab |
| View group members | Groups tab → Edit → Group members tab |
| Add members to a group | Group members tab → + Add members |
| Verify user group assignments | My organization → Team members tab |
Tips & Notes
Section titled “Tips & Notes”- A user can belong to multiple groups simultaneously. All their groups appear as badges in the Team members view.
- You can only add users who are already active members of your organisation.
- The group creator is automatically added as the first member.
- Group names and descriptions can be updated at any time via the Edit → Group details tab.